Fermentation Crock or Jar Set with Airlock Lids — Our Top Recommendation
A proper fermentation jar set gives you wide-mouth jars (easier to pack food) with airlock lids that let CO2 escape without letting oxygen in. Oxygen is the enemy of lacto-fermentation — it causes…
In a hurry? That’s our pick. Want the reasoning and the full comparison? Keep reading.
Your grandparents knew how to preserve food without a fridge. They packed cabbage into crocks, salted cucumbers in jars, and turned milk into yogurt on their kitchen counter. Fermentation is the oldest food technology on earth — and it is making a massive comeback. If you have been searching for a reliable home fermentation beginners guide, you just found one that gets you from zero to your first finished batch in a single weekend.
Here is the thing most guides overcomplicate: fermentation is not chemistry class. You do not need a lab, a degree, or even much counter space. Salt, vegetables, a jar, and a few days of patience — that is all it takes. People have done this successfully for over 10,000 years with far less than you have in your kitchen right now.
This guide walks you through three beginner projects (sauerkraut, lacto-fermented pickles, and water kefir), the essential equipment, food safety basics, and the mistakes that trip up every first-timer. By Sunday evening, you will have living, probiotic-rich food sitting on your counter — food you made yourself, for pennies.
Key Takeaways
- Fermentation is 10,000+ years old — the safest and simplest food preservation method you can learn at home
- Your first batch of sauerkraut requires only two ingredients: cabbage and salt. Total cost under $5
- Starter equipment runs $15-40 — a fermentation jar set with airlock lids is all you need
- Fermented foods deliver probiotics, improve gut health, increase nutrient absorption, and extend shelf life for months
- The three easiest beginner projects (sauerkraut, pickles, water kefir) all finish within 3-7 days
- Common mistakes are easy to avoid once you know the rules — proper salt ratios and keeping food submerged solve 90% of problems
Why Fermented Foods Are a Superpower
Before you roll up your sleeves, you should know why this skill is worth learning. Fermentation is not just a trendy food hobby — it is a practical superpower that saves money, improves your health, and reduces your dependence on grocery stores.
Probiotics and gut health
Every spoonful of properly fermented food contains billions of beneficial bacteria — the same probiotics you pay $30-50 per month for in supplement form. These bacteria colonize your gut, strengthen your immune system, improve digestion, and even influence your mood through the gut-brain axis. A single serving of homemade sauerkraut contains more live probiotics than most commercial supplements. And unlike supplements, fermented foods deliver those bacteria in a food matrix that keeps them alive through your stomach acid.
Nutrient bioavailability
Fermentation breaks down anti-nutrients (compounds that block mineral absorption) and pre-digests food, making vitamins and minerals dramatically more available to your body. Fermented cabbage has 20 times more bioavailable vitamin C than raw cabbage. Fermented dairy provides far more absorbable calcium and B vitamins than regular milk. You eat the same food — but your body actually uses more of what is in it.
Extended shelf life
A head of cabbage lasts 2-3 weeks in your fridge before it wilts. That same cabbage, turned into sauerkraut, lasts 6-12 months — no freezer, no canning equipment, no pressure cooker. Fermentation was the original refrigerator. Your great-grandparents used it to survive winters without electricity. You can use it to build a pantry that does not depend on constant grocery runs.
Saves real money
A 16-ounce jar of organic raw sauerkraut costs $8-12 at the store. You can make a full quart at home for under $2 in ingredients. Water kefir costs pennies per glass once you have the grains (which multiply and last indefinitely). Over a year of regular fermentation, you save hundreds of dollars compared to buying probiotic foods and supplements retail.
Food independence
Knowing how to ferment means you can preserve any seasonal surplus — that bumper crop of cucumbers, the 10 pounds of cabbage on sale, the farmers market haul that is about to go bad. Nothing goes to waste. You transform perishable food into shelf-stable food using only salt and time. That is real food sovereignty, and it pairs perfectly with other preservation methods like dehydrating and canning.
Essential Equipment
You can technically ferment in any glass jar with a loose lid. But the right equipment makes your first batch more reliable and less likely to develop problems. Here is what we recommend:
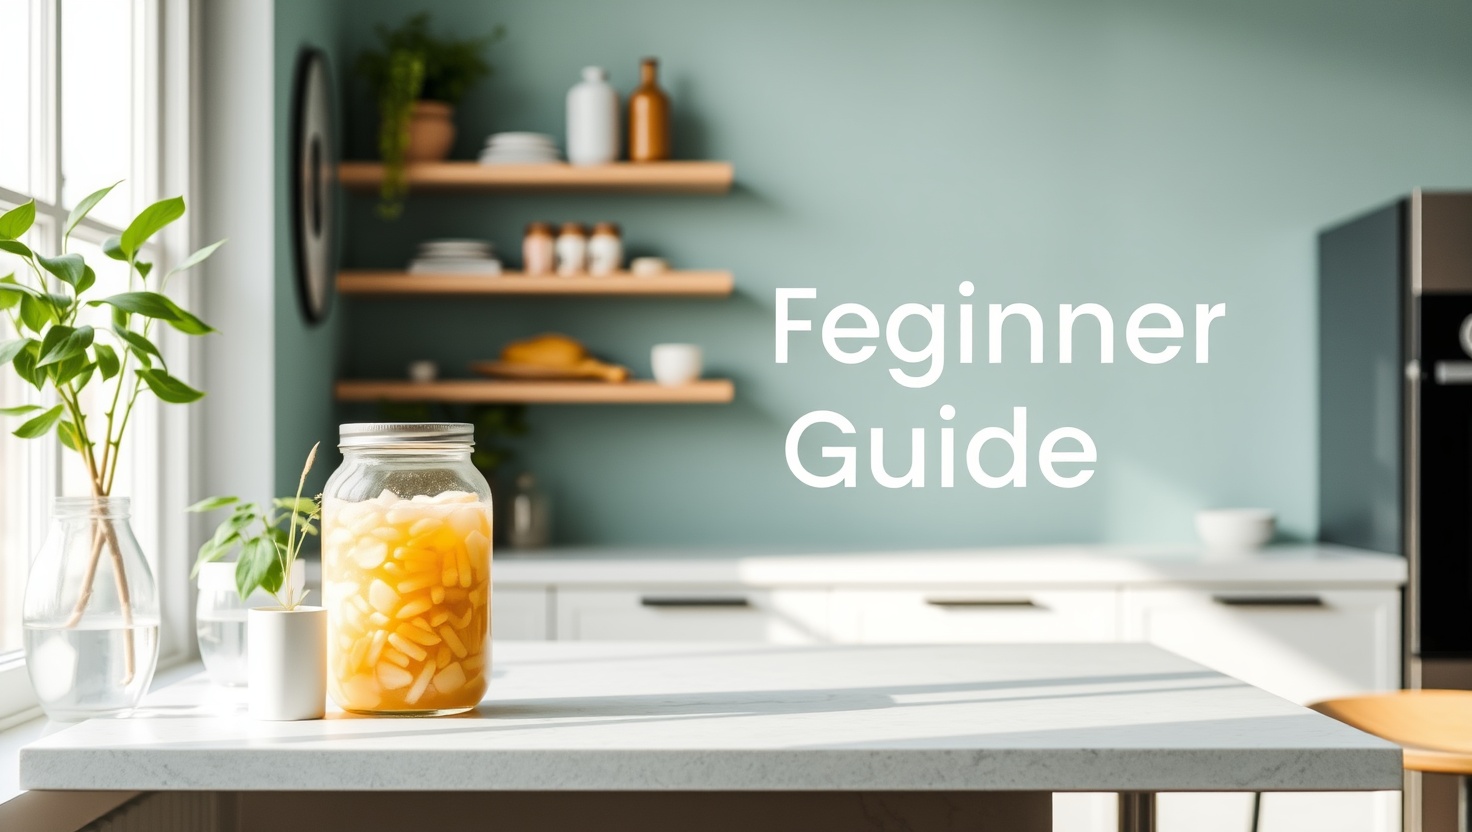
Fermentation Crock or Jar Set with Airlock Lids
A proper fermentation jar set gives you wide-mouth jars (easier to pack food) with airlock lids that let CO2 escape without letting oxygen in. Oxygen is the enemy of lacto-fermentation — it causes mold. Airlock lids eliminate the need to "burp" your jars daily and dramatically reduce the chance of a failed batch. Most kits include 2-4 jars with silicone airlock lids.
Why you want this
- Airlock lids prevent mold — set and forget
- Wide-mouth design makes packing easy
- Reusable for hundreds of batches
- Most kits include glass weights
Keep in mind
- Regular mason jars work in a pinch
- Glass is breakable — handle with care
- Takes up counter space during ferments
- Not necessary for water kefir
We earn a commission if you purchase through our links — at no extra cost to you.
Digital Kitchen Scale
Salt ratios make or break a ferment. Too little salt and harmful bacteria can grow. Too much and you kill the beneficial bacteria you want. A kitchen scale lets you measure salt as a percentage of vegetable weight (the only accurate method). Forget tablespoon measurements — they vary wildly depending on salt crystal size. Weigh your vegetables, calculate 2-3% of that weight in salt, and you hit the sweet spot every time.
Why you want this
- Precise salt ratios every time
- Eliminates guesswork completely
- Useful for cooking and baking too
- Battery lasts for years
Keep in mind
- Cheap scales can drift — recalibrate occasionally
- Needs flat, stable surface
- Battery-powered models need replacements
- Small platform may not fit large bowls
We earn a commission if you purchase through our links — at no extra cost to you.
pH Test Strips
Want to know if your ferment is safe without guessing? A pH strip takes the mystery out of it. Properly fermented vegetables should reach a pH of 4.6 or lower — that acidic environment prevents harmful bacteria like botulism from surviving. Dip a strip in your brine after 3-5 days. If you see 4.6 or below, your ferment is safe to eat and store. Peace of mind for less than ten dollars.
Why you want this
- Objective safety verification
- Takes 10 seconds to test
- 100+ strips per pack — lasts ages
- Builds confidence for beginners
Keep in mind
- Not strictly necessary with proper salt ratios
- Experienced fermenters rely on taste and smell
- Strips have expiration dates
- Color matching can be tricky in low light
We earn a commission if you purchase through our links — at no extra cost to you.
Glass Fermentation Weights
The golden rule of fermentation: keep everything below the brine. Any vegetable piece that pokes above the liquid is exposed to oxygen and will grow mold. Glass fermentation weights sit inside your jar on top of the vegetables, pushing them down under the brine. They are heavy enough to hold everything submerged, food-safe, and easy to clean. A small zip-lock bag filled with brine works as a DIY alternative, but glass weights are more reliable and reusable.
Why you want this
- Prevents mold by keeping food submerged
- Fits standard wide-mouth mason jars
- Easy to sterilize and reuse
- One set lasts forever
Keep in mind
- A small jar or bag of brine works as backup
- Glass can chip if dropped
- Must match your jar size
- Not needed for water kefir
We earn a commission if you purchase through our links — at no extra cost to you.
Project 1: Homemade Sauerkraut (The Easiest Ferment on Earth)
If you have never fermented anything before, start here. Sauerkraut requires exactly two ingredients — cabbage and salt — and it is nearly impossible to mess up if you follow these steps. You will have tangy, crunchy, probiotic-rich sauerkraut in 3-7 days.
What you need
- 1 medium head of green cabbage (about 2 lbs / 900g)
- 1 tablespoon (18g) sea salt or kosher salt — no iodized salt
- Wide-mouth quart jar with airlock lid (or regular lid, loosened)
- Fermentation weight or small zip-lock bag filled with brine
Prep the Cabbage
Remove the outer leaves (save one for later). Quarter the cabbage and cut out the core. Slice it into thin shreds — about the width of a nickel. The thinner you slice, the faster it ferments. Place all shredded cabbage into a large, clean bowl.
Salt and Massage
Weigh your shredded cabbage. Calculate 2% of that weight in salt (for 900g cabbage, use 18g salt). Sprinkle the salt over the cabbage and massage it firmly with your hands for 5-10 minutes. The cabbage will wilt, shrink, and release liquid. Keep going until you have a pool of brine at the bottom of the bowl. This brine is your preservation liquid.
Pack the Jar Tightly
Transfer handfuls of salted cabbage into your jar, pressing down firmly with your fist or a wooden spoon after each handful. Pack it tight — you want to eliminate air pockets. Pour all the brine from the bowl into the jar. The cabbage should be fully submerged. Place the saved outer leaf on top as a cap, then add your fermentation weight.
Seal and Wait
Attach your airlock lid (or place a regular lid on loosely — never seal a ferment airtight without an airlock, as CO2 builds up and can break the jar). Set the jar on a plate (to catch any overflow) in a spot out of direct sunlight at room temperature (65-75°F). Wait 3-7 days. Taste it on day 3 — when it hits the sourness level you enjoy, move it to the fridge. Refrigeration slows fermentation nearly to a halt.
Project 2: Lacto-Fermented Pickles (Crunchy, Tangy, Addictive)
These are NOT vinegar pickles. Lacto-fermented pickles use salt brine instead of vinegar, which means they are alive with probiotics and have a complex tangy flavor that vinegar pickles cannot touch. They stay crunchy, they taste incredible, and they take about 10 minutes of active work.
What you need
- 1-2 lbs small, firm pickling cucumbers (Kirby variety works best)
- 1 quart (4 cups) filtered water — no chlorinated tap water
- 2 tablespoons (36g) sea salt or kosher salt
- 3-4 cloves garlic, smashed
- 1 tablespoon whole dill seed or 2 fresh dill heads
- Optional: 1 teaspoon whole black peppercorns, 1 bay leaf, red pepper flakes
- Wide-mouth quart jar, fermentation weight, airlock lid
Make the Brine
Dissolve 2 tablespoons of salt in 1 quart of filtered water. Stir until fully dissolved. Important: do not use tap water with chlorine — chlorine kills the beneficial bacteria you need for fermentation. Use filtered water, spring water, or let tap water sit uncovered for 24 hours to off-gas the chlorine.
Prep and Pack
Wash cucumbers and trim off the blossom end (the end opposite the stem). The blossom end contains enzymes that can soften your pickles. Place garlic, dill, peppercorns, and any other spices at the bottom of your jar. Pack cucumbers in tightly — standing upright works best for whole pickles. Wedge them in so they do not float.
Pour, Weight, Seal
Pour the brine over the cucumbers until they are fully submerged. Leave about 1 inch of headspace at the top. Place your fermentation weight on top to keep cucumbers under the brine. Attach your airlock lid. Set on a plate at room temperature, out of direct sunlight.
Ferment for 3-5 Days
Taste a pickle on day 3. If you like a mild tang, refrigerate now. For a stronger sour flavor, let them go 5-7 days. The brine will turn cloudy — that is perfectly normal and means fermentation is active. Once they hit your preferred sourness, move the whole jar to the fridge. They will keep for 2-3 months refrigerated.
Project 3: Water Kefir (Fizzy Probiotic Soda in 48 Hours)
Water kefir is a naturally fizzy, mildly sweet probiotic drink made by fermenting sugar water with water kefir grains (they look like translucent crystals, not actual grains). It tastes like a light, refreshing soda — and you can flavor it with any fruit juice you like. Kids love it. Adults love it. Your gut microbiome really loves it.
What you need
- 3-4 tablespoons water kefir grains (buy once — they multiply forever)
- 1/4 cup organic cane sugar
- 1 quart filtered water
- A quart jar and breathable cover (cloth + rubber band)
- For second ferment: a swing-top bottle and fruit juice of your choice
Dissolve Sugar in Water
Dissolve 1/4 cup of organic cane sugar in 1 quart of filtered water. Stir until completely dissolved. Let it cool to room temperature if you used warm water — heat kills kefir grains. The sugar feeds the kefir grains; by the time fermentation finishes, most of the sugar is consumed by the bacteria and yeast.
Add Kefir Grains
Drop your water kefir grains into the sugar water. Cover the jar with a breathable cloth or coffee filter secured with a rubber band — not an airtight lid. The grains need airflow during the primary ferment. Place the jar in a warm spot (68-85°F) away from direct sunlight.
Wait 24-48 Hours
After 24 hours, taste it. The water should be slightly tangy and less sweet than when you started. At 48 hours, most of the sugar will be consumed and the water will taste mildly sour with light effervescence. Do not let it go beyond 72 hours — the grains will starve without sugar and weaken.
Strain, Flavor, and Carbonate
Strain out the kefir grains (save them — drop them into fresh sugar water to start your next batch immediately). Pour the finished water kefir into a swing-top bottle, add 2-3 tablespoons of fruit juice (grape, mango, berry — anything works), seal the bottle tightly, and let it sit at room temperature for 12-24 hours. The sealed bottle traps CO2, creating natural carbonation. Refrigerate before opening — it will be fizzy.
Fermentation Methods Compared
Different fermentation methods suit different goals. Here is how the main approaches stack up:
| Method | Time | Difficulty | Equipment | Best For |
|---|---|---|---|---|
| Lacto-fermentation | 3-7 days | Easy | Jar + salt | Vegetables, pickles, sauerkraut |
| Vinegar pickling | Instant (no ferment) | Easy | Pot + jars | Quick shelf-stable pickles (no probiotics) |
| Kombucha | 7-14 days | Medium | Jar + SCOBY + tea | Fizzy probiotic tea drink |
| Water kefir | 24-48 hours | Easy | Jar + kefir grains | Probiotic soda, kid-friendly |
| Yogurt | 8-12 hours | Medium | Pot + thermometer | Dairy fermentation, breakfast staple |
Notice that lacto-fermentation and water kefir are the easiest entry points. Kombucha and yogurt require more precise temperature control, so save those for after you have a few successful batches under your belt.
Common Mistakes and How to Avoid Them
Mistake 1: Using iodized table salt
Iodized salt contains additives that inhibit the lactic acid bacteria you need for fermentation. The iodine and anti-caking agents can slow or kill your ferment, create off-flavors, and produce cloudy brine for the wrong reasons. The fix: Use sea salt, kosher salt, or pickling salt. Check the label — it should list one ingredient: salt. Nothing else.
Mistake 2: Not keeping vegetables submerged
Any food above the brine line is exposed to oxygen. Oxygen invites mold. Mold ruins batches. This is the number one reason beginners have a bad first experience. The fix: Use fermentation weights. Check your jars daily for the first few days and push any floaters back down. If the brine level drops, add a small amount of 2% saltwater solution.
Mistake 3: Using chlorinated tap water
Chlorine exists in tap water specifically to kill bacteria. That is great for drinking water — terrible for fermentation, where you need bacteria to thrive. The fix: Use filtered water, spring water, or leave tap water in an open container for 24 hours. The chlorine off-gasses naturally. For chloramine-treated water (common in large cities), you need a carbon filter — chloramine does not evaporate.
Mistake 4: Fermenting in a sealed container without an airlock
Fermentation produces CO2. A sealed jar with no way for gas to escape becomes a pressure bomb. At best, brine overflows everywhere. At worst, the jar cracks or explodes. The fix: Use an airlock lid, or simply leave your regular lid loosely placed on top (not screwed tight). The exception is the second ferment of water kefir, where you intentionally trap CO2 for carbonation — but only for 12-24 hours in a pressure-rated swing-top bottle.
Mistake 5: Giving up too early because of smell or appearance
Active fermentation produces bubbles, cloudy brine, and a tangy-sour smell. First-timers sometimes panic and toss a perfectly good batch because it looks or smells "weird." The fix: Cloudy brine is normal. Bubbling is normal. A tangy, sour, slightly funky smell is normal. What is NOT normal: fuzzy mold (especially black, green, or pink), a rotten egg smell, or slimy texture. Learn the difference, and you will never waste a good ferment again.
Food Safety: When to Toss a Batch
Fermentation is extremely safe when done correctly — far safer than home canning. The acidic, salty environment created by lactic acid bacteria is hostile to dangerous pathogens like botulism, E. coli, and salmonella. That said, things can go wrong. Here is your decision guide:
Keep fermenting — this is normal
- Cloudy brine — means fermentation is active. Good sign.
- Bubbles rising — CO2 production from healthy bacteria. Great sign.
- White film on surface (kahm yeast) — harmless. Skim it off, push vegetables back under brine, and continue. Tastes slightly yeasty but is not dangerous.
- Strong sour smell — that is lactic acid. Your ferment is working. It should smell like pickles, not like garbage.
- Vegetables soften slightly — normal, especially after 5+ days. Still safe and delicious.
Toss the batch — do not eat it
- Fuzzy mold in black, green, blue, or pink — this is actual mold, not kahm yeast. If you see fuzzy growth in these colors, discard everything. Do not scrape it off and eat the rest.
- Rotten, putrid smell — fermented food should smell sour and tangy, never like rotting garbage. If it makes you recoil, trust your nose.
- Slimy, ropy texture — if vegetables feel slimy like okra and you did not use okra, something went wrong. Discard.
- Pink or red discoloration — on vegetables that should not be pink. This can indicate unwanted bacterial growth.
How Fermentation Fits Your Food Independence Journey
Fermentation is not a standalone skill — it is one piece of a larger food independence puzzle. When you grow food in your balcony container garden, you inevitably end up with more cucumbers or herbs than you can eat fresh. Fermentation transforms that surplus into months of preserved food without any electricity or special equipment.
Pair fermentation with a pollinator garden to boost your vegetable yields, and you have a cycle: grow more, waste less, preserve everything, depend on the grocery store a little less each season. That is the path from "I bought a jar of sauerkraut once" to "I have not bought pickles or sauerkraut in two years."
Start with one project this weekend. Master it. Then try the next one. Within a month, you will have a counter full of living, probiotic-rich foods — made from scratch, for almost nothing, using a skill your ancestors would recognize instantly.
Ready to Start Your First Ferment?
Grab the essentials and have your first batch bubbling by Sunday evening.
Get a Fermentation Kit Browse Fermentation CrocksWant to expand your food skills beyond fermentation? Check out our guides on food preservation for beginners, container gardening on your balcony, and building a pollinator garden for a complete food independence toolkit.
Get Our Free Fermentation Starter Guide
Salt ratio cheat sheets, troubleshooting charts, and seasonal fermentation ideas. One email per week.